When connecting to the APIC you are enforced to use SSL. And in this case, you are either expected to use a valid SSL cert or a self-signed one. In the latter case and if this is not configured properly, you’ll get bothered by those browser warnings.
One option is to request certs from a commercial provider (being one or two year valid) or – and this is becoming more and more standard – using a letsencrypt.org validated cert.
Disadvantage of those certs – they have to be renewed every three months.
If you are building up a SSL based communication, you need on your SSL accepting end.
- the private key of the server (that must not be visible publically)
- the chain PEM
- the certificate itself.
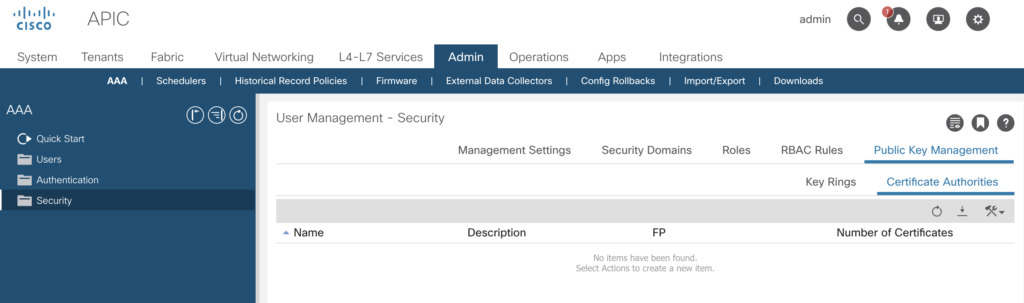
The Certs are managed within APIC at
Admin -> AAA -> Security (menu left) -> Public Key Management.
We’ll start with the Certificate Authorities. The diagram (nicked from letsencrypt) shows the relationships.
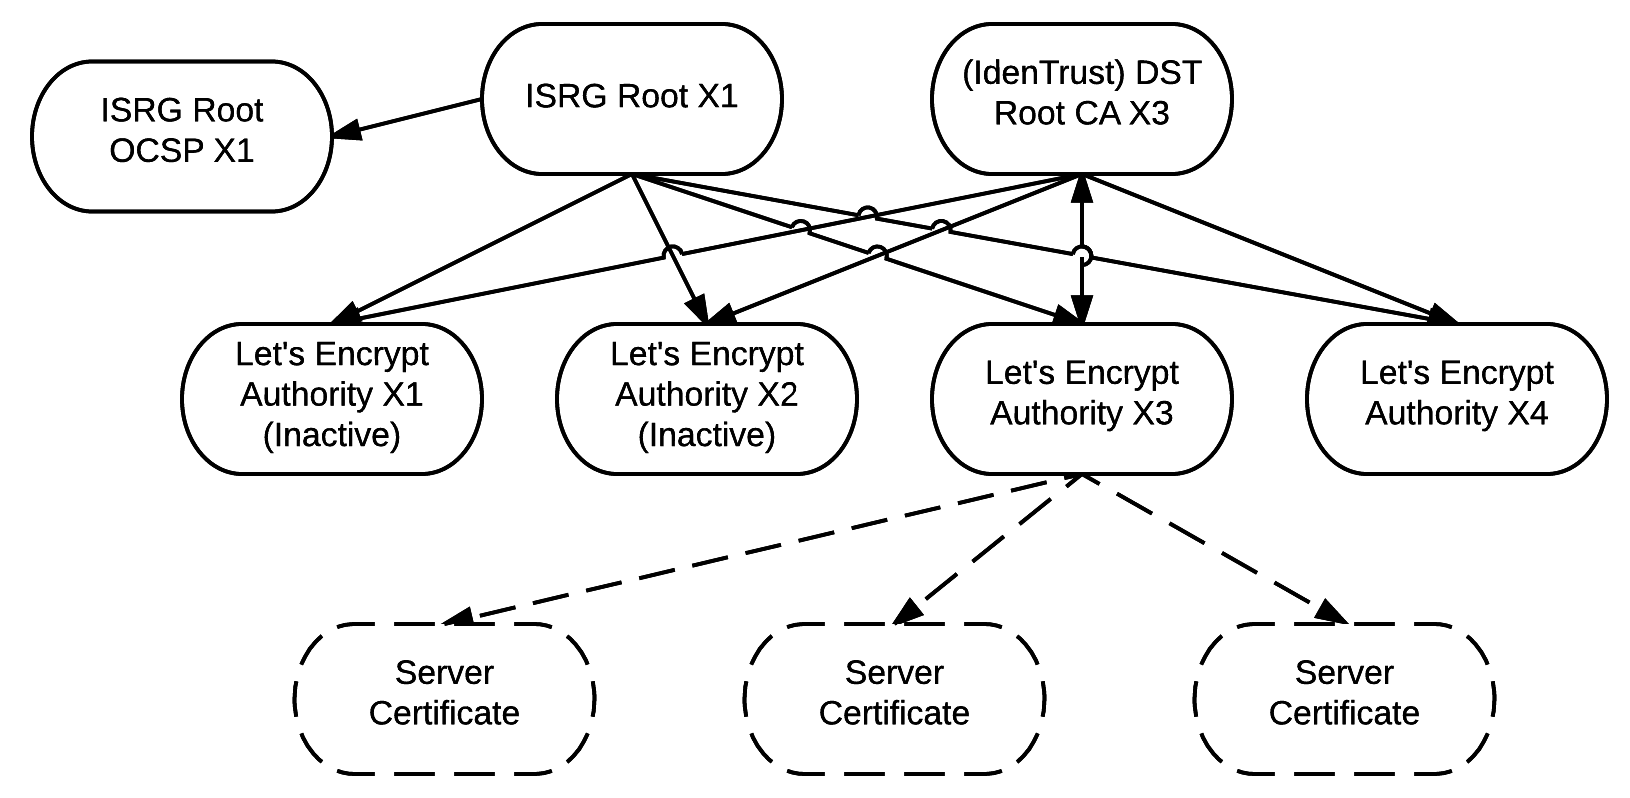
So we ingest first the ISRG Root X1 certificate
https://letsencrypt.org/certs/isrgrootx1.pem.txt
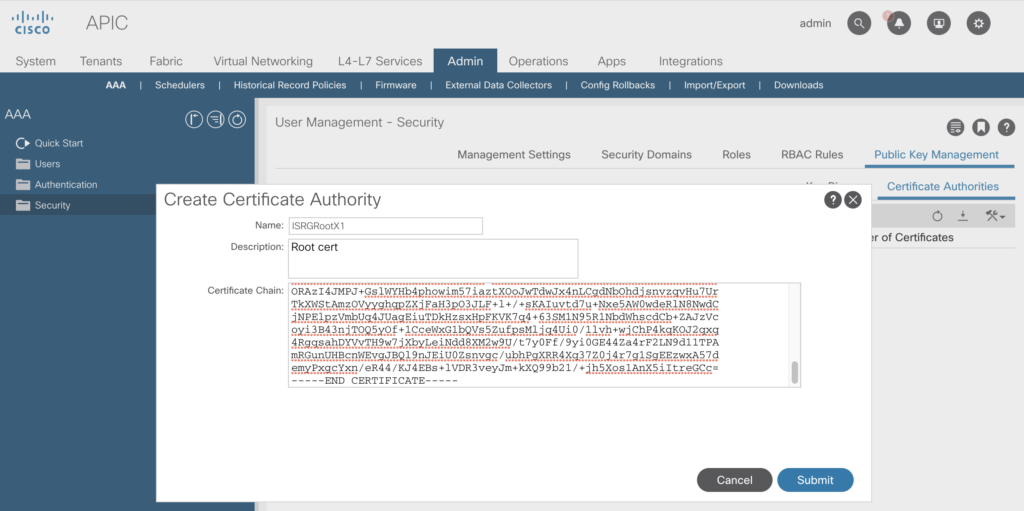
just copy the text and paste it into the box opening up when selecting „Create Certificate Authority“
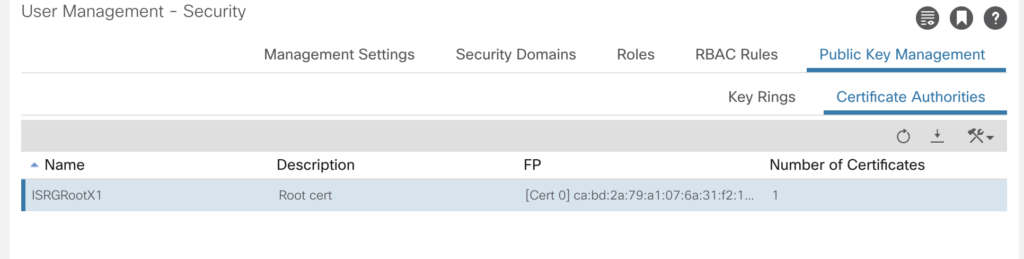
After some seconds (including a to be ignored message about web sockets to be restarted) the cert is visible.
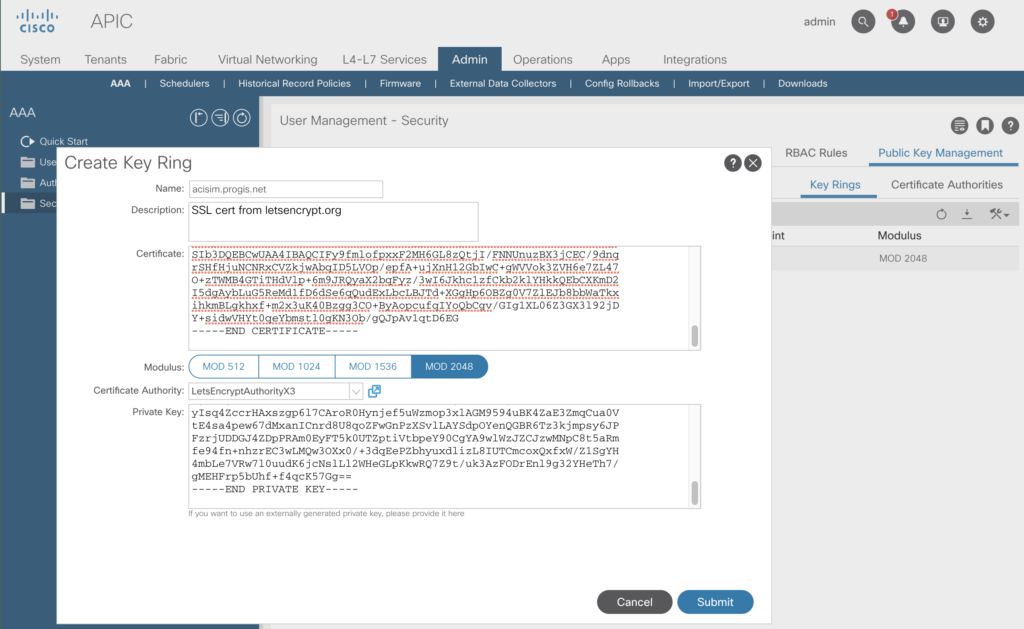
As we’ve got now a Certificate Authority, we are able to import the certificate and the private key in the key ring section.
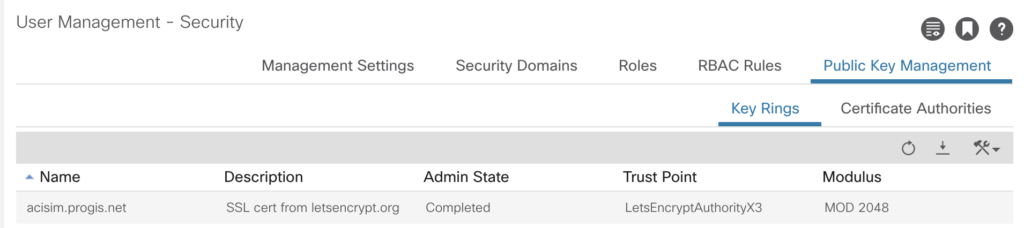
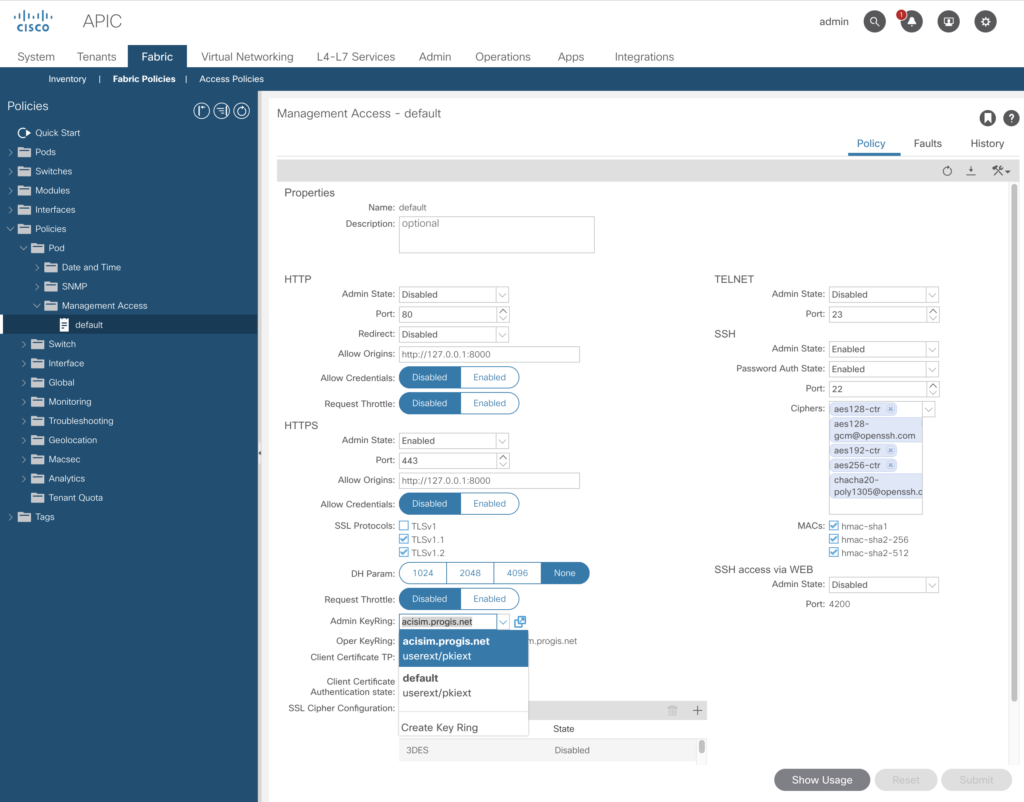
As now the key has been successfully imported – the final step is to enable his per policy.
To achieve this change, you to go to:
-> Fabric -> Fabric Policies -> Policies (left menu) -> Pod -> Management Access -> default
Choose there the Admin KeyRing you’ve just created.
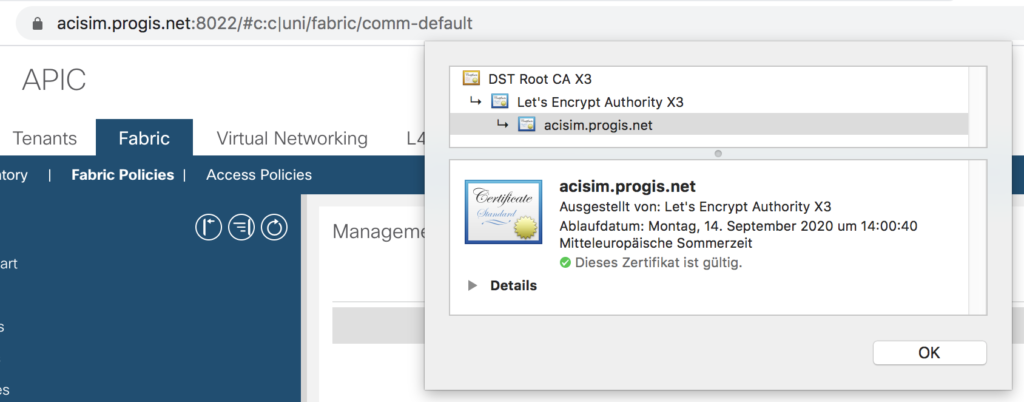
A quick check via a webbrowser – all set.
By the way – in this configuration tab you are able to enable plain http as well – e.g. to use a NGINX reverse proxy in front of.
NGINX Setup
To use Nginx as a reverse proxy it is required to handle the websocket connections properly.
If take away the SSL offloading from the APIC and move it to the Nginx, things are much easier to handle. Requires to turn on http internally, and to create this configuration.
server {
    listen       443 ssl http2;
    server_name  acisim.progis.net;
        ssl_certificate /etc/letsencrypt/live/acisim.progis.net/fullchain.pem;
        ssl_certificate_key /etc/letsencrypt/live/acisim.progis.net/privkey.pem;

    ssl_session_timeout  5m;
ssl_protocols TLSv1.2;
#    ssl_protocols  SSLv2 SSLv3 TLSv1;
    ssl_ciphers  ALL:!ADH:!EXPORT56:RC4+RSA:+HIGH:+MEDIUM:+LOW:+EXP;
    ssl_prefer_server_ciphers   on;

    location / {
    	    proxy_pass http://192.168.140.40:80;
            proxy_set_header X-Real-IP  $remote_addr;
            proxy_set_header X-Forwarded-For $proxy_add_x_forwarded_for;
	    proxy_set_header Upgrade $http_upgrade; # websocket handling
    	    proxy_set_header Connection "Upgrade"; # websocket handling
            proxy_set_header Host $host;
client_max_body_size 128m;
    }
}
The two lines tagged with # websocket handling will do the trick.